Consent Mode v2 with OneTrust & Google Tag Manager
Learn how to implement Google Consent Mode v2 on your website or app using OneTrust and Google Tag Manager.
Introductions
In this blog post, we are going to discuss what Consent Mode v2 is, why it is critical for your business to understand it, and how to implement it. Consent Mode v2 is often misunderstood by businesses and the implementation process is a little murky on the developer side. We hope to clear up any confusion and offer helpful tips as you implement Consent Mode v2 with OneTrust and Google Tag Manager.
Let’s get started! 👇
What is OneTrust?
The OneTrust platform offers a simple and secure way to maintain compliance with global consumer privacy protection laws.
In today’s tutorial, we will focus on the OneTrust Cookie Consent product. OneTrust allows you to manage which cookies and third party scripts fire on your site based on consent.
What is Google Tag Manager?
Google Tag Manager (GTM) is a web-based tool that allows marketers and developers to manage third party scripts and tags on their website without modifying the code.
Google Tag Manager is a powerful tool that is especially useful managing cookie consent when integrated with OneTrust.
What is Consent Mode v2?
Google Consent Mode v2 is a framework that is designed to integrate your website visitor consent preferences with Google’s network of advertising and analytics tools.
This allows Google to stay in compliance with the ever changing global landscape of consumer privacy compliance.
Essentially, it is another important step to protect your visitors’ privacy and offer a way to opt-out of certain tracking services.
Why is it important to implement Consent Mode v2?
Google is prompting all customers using their suite of products (Google Analytics 4, Google Ads, etc) to make necessary changes to implement Consent Mode v2. Without properly setting up Consent Mode v2, your account is at risk of being penalized or even disabled.
Updates in OneTrust Admin
This tutorial assumes that you already have working knowledge of OneTrust and perhaps already have the cookie consent product implemented on your site.
Our first steps are to make a few changes in the OneTrust admin platform.
Once logged into OneTrust, navigate to the “Geolocation Rules” tab on the left navigation bar.
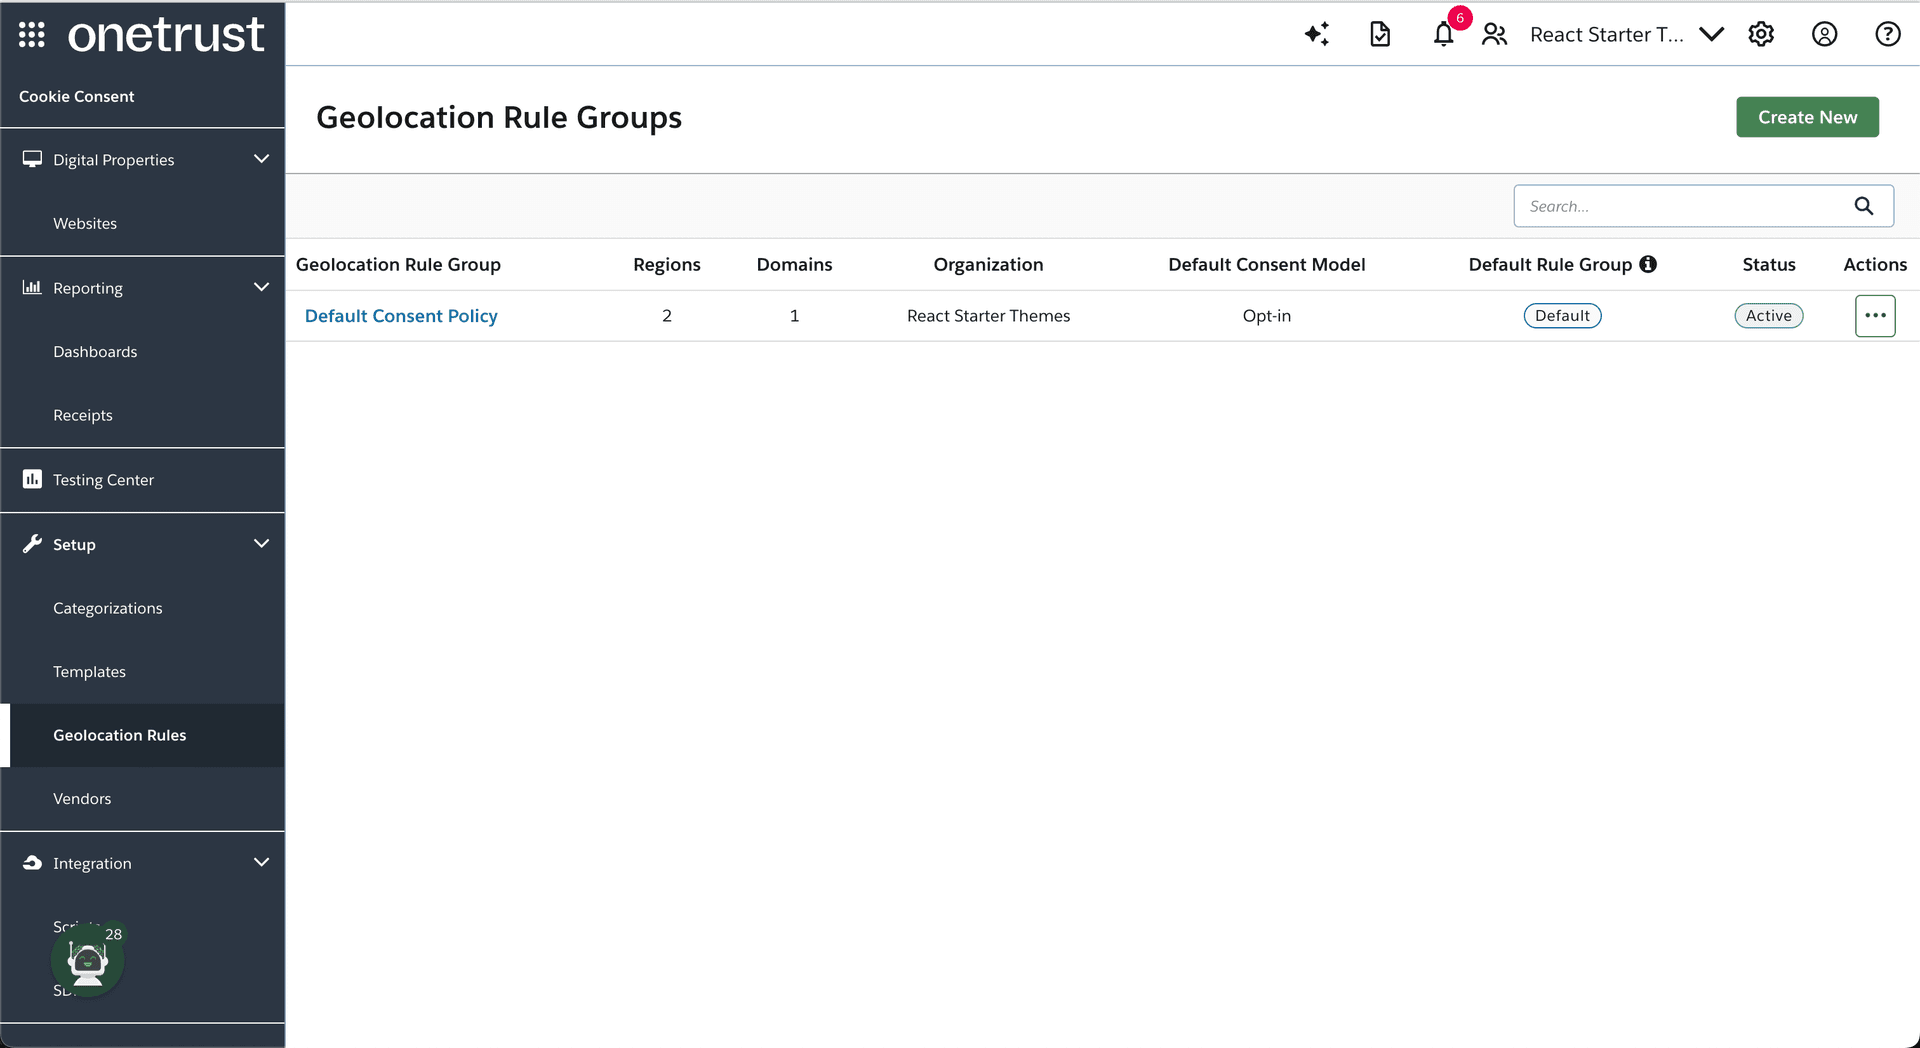
Geo location rules
Next, click the Rule group link and click the “Edit” icon to enable updates on your geolocation rule set.
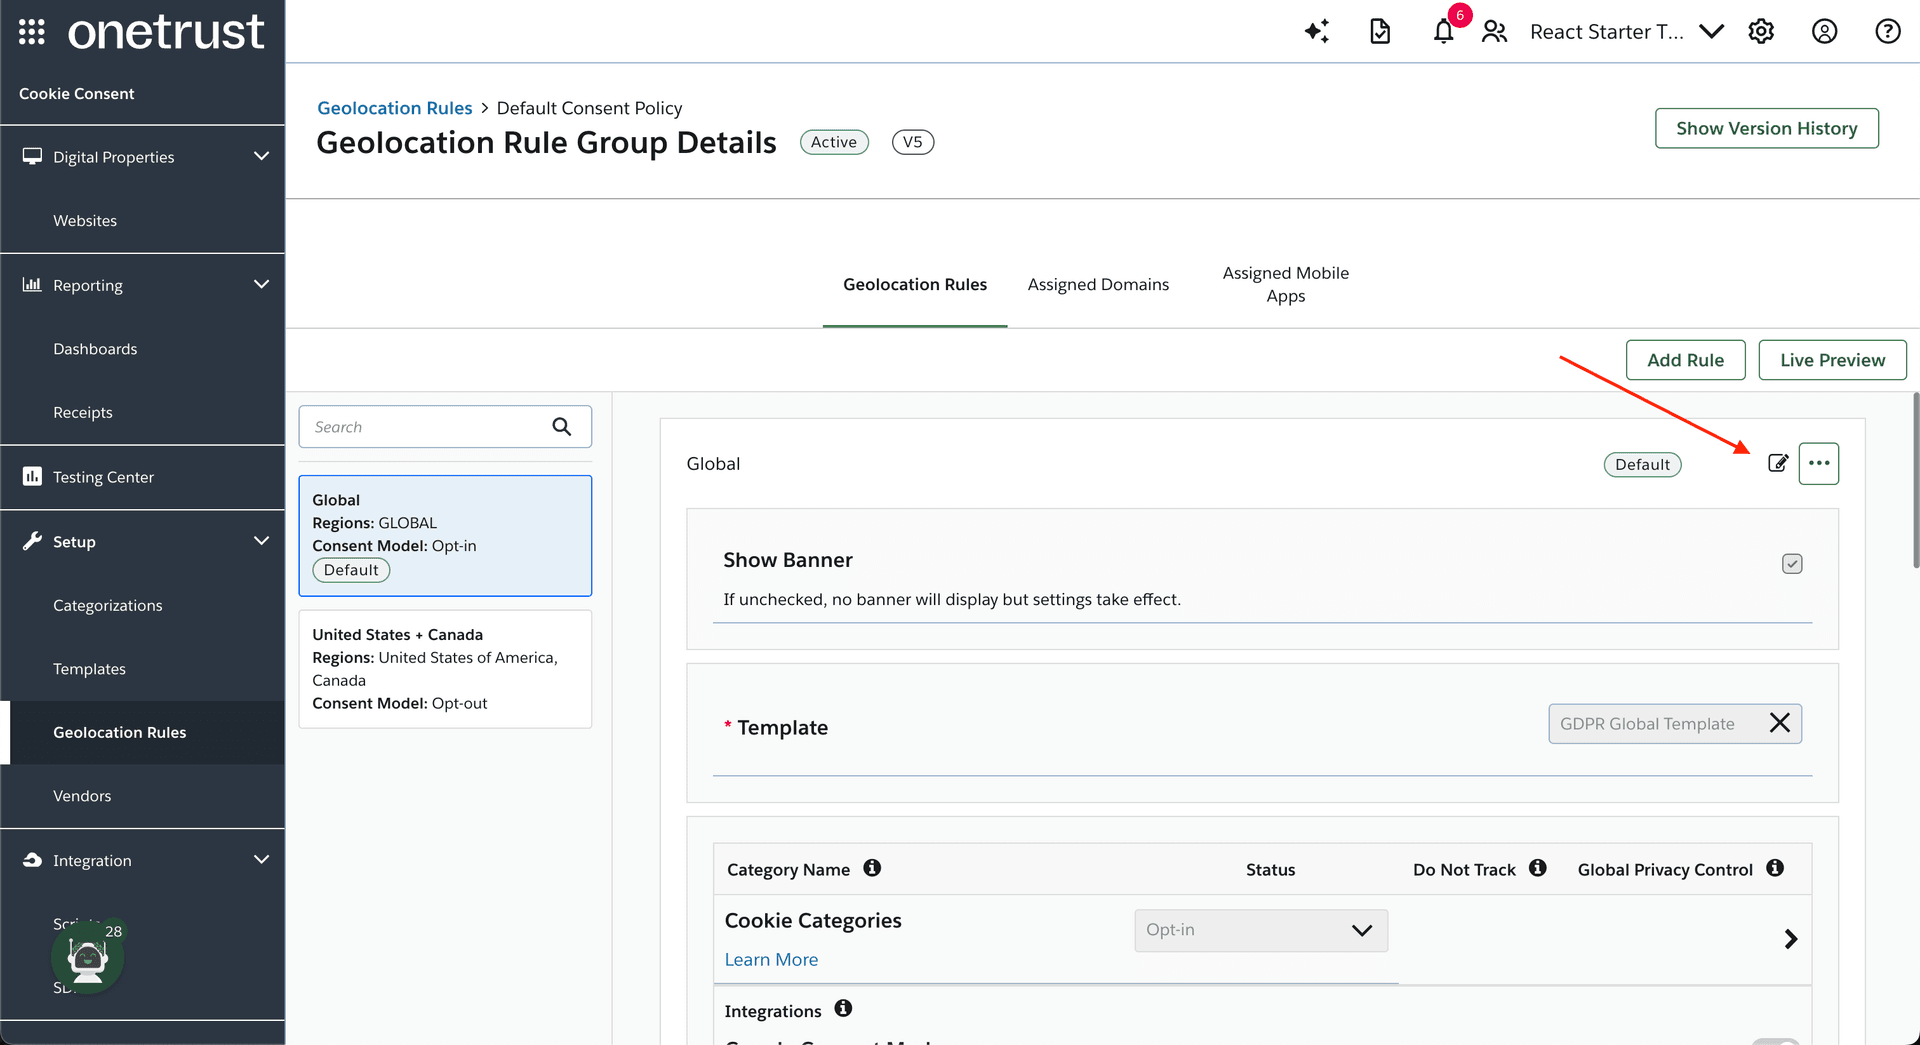
Edit location rules
Once the edit screen is opened, make sure you toggle on the Google Consent Mode integration. Next, you will apply your business specific cookie categorization to the proper Google Consent mode.
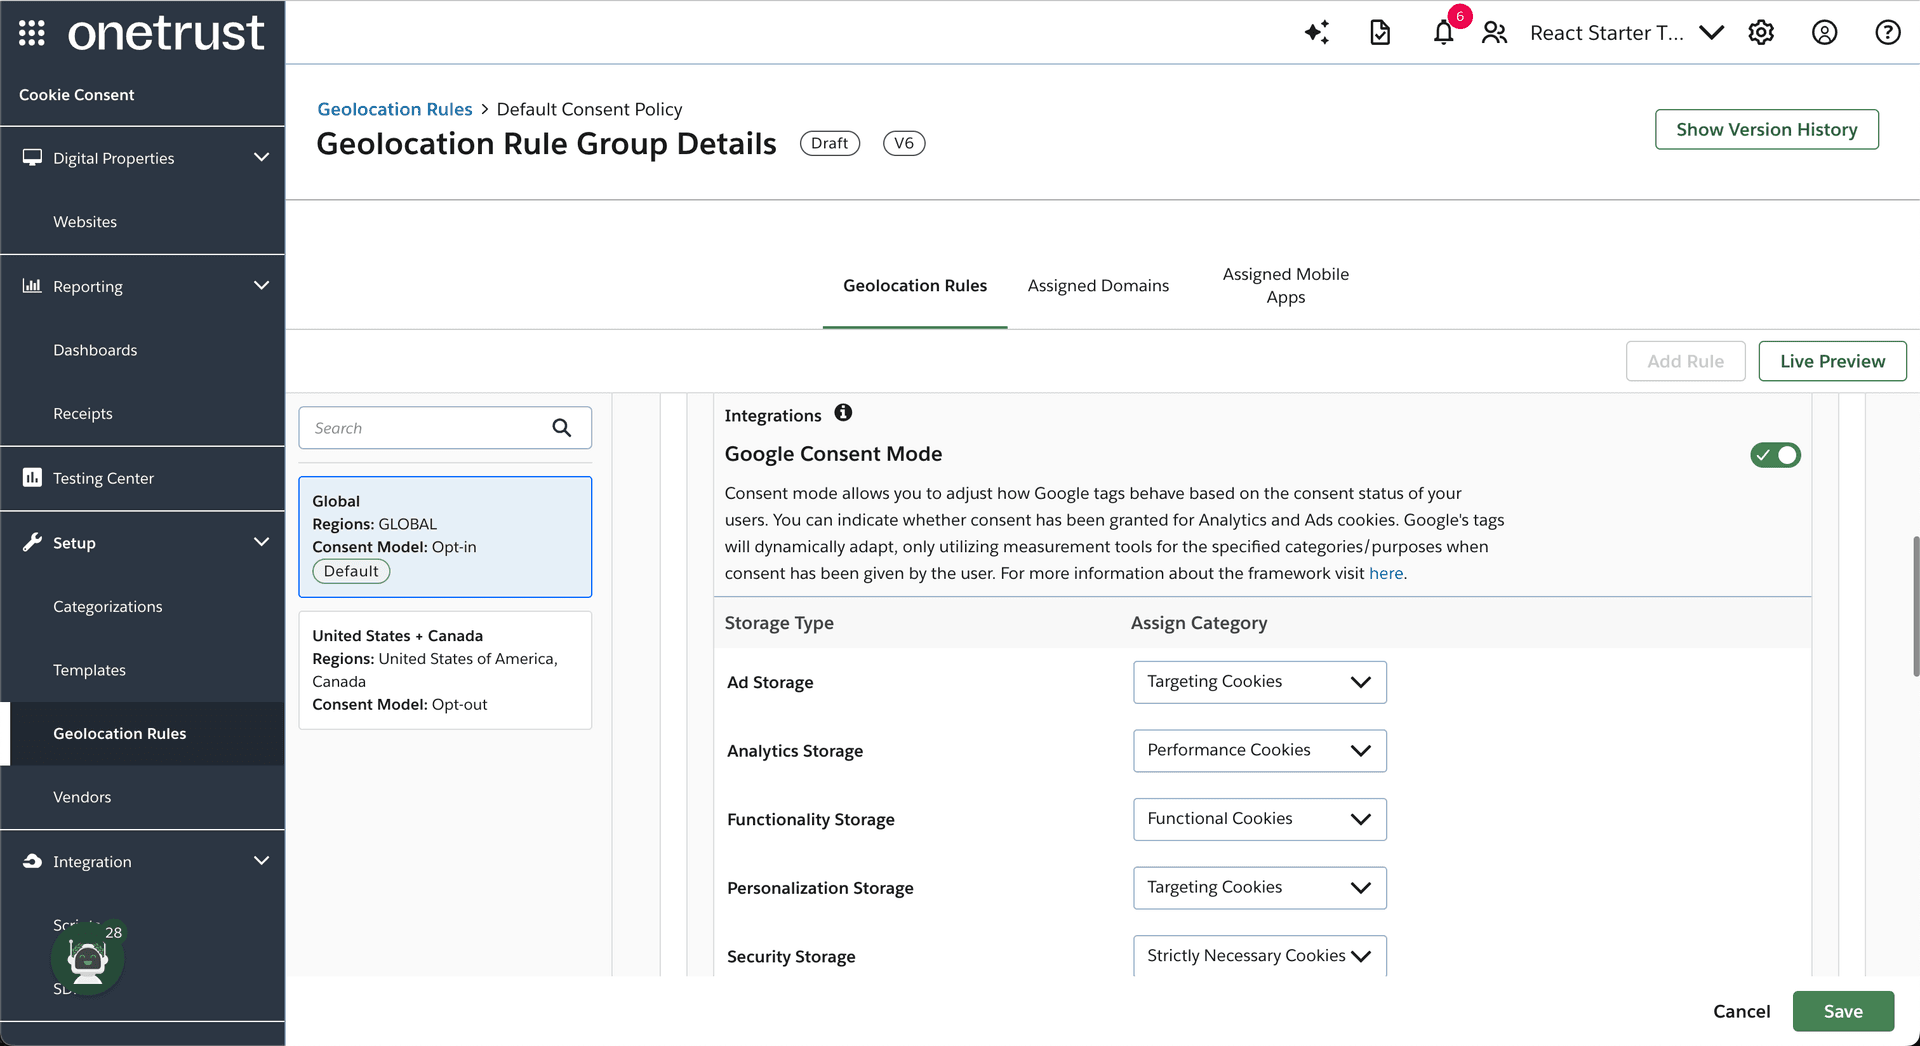
Map OneTrust consent mode
For example, in our use case we mapped the Google supplied storage type value of “Ad Storage” to the OneTrust “Targeting Cookies” category.
After you have mapped all values, click save and be sure to re publish your OneTrust script so the changes are implemented.
Updates in Google Tag Manager admin
OneTrust CMP Tag
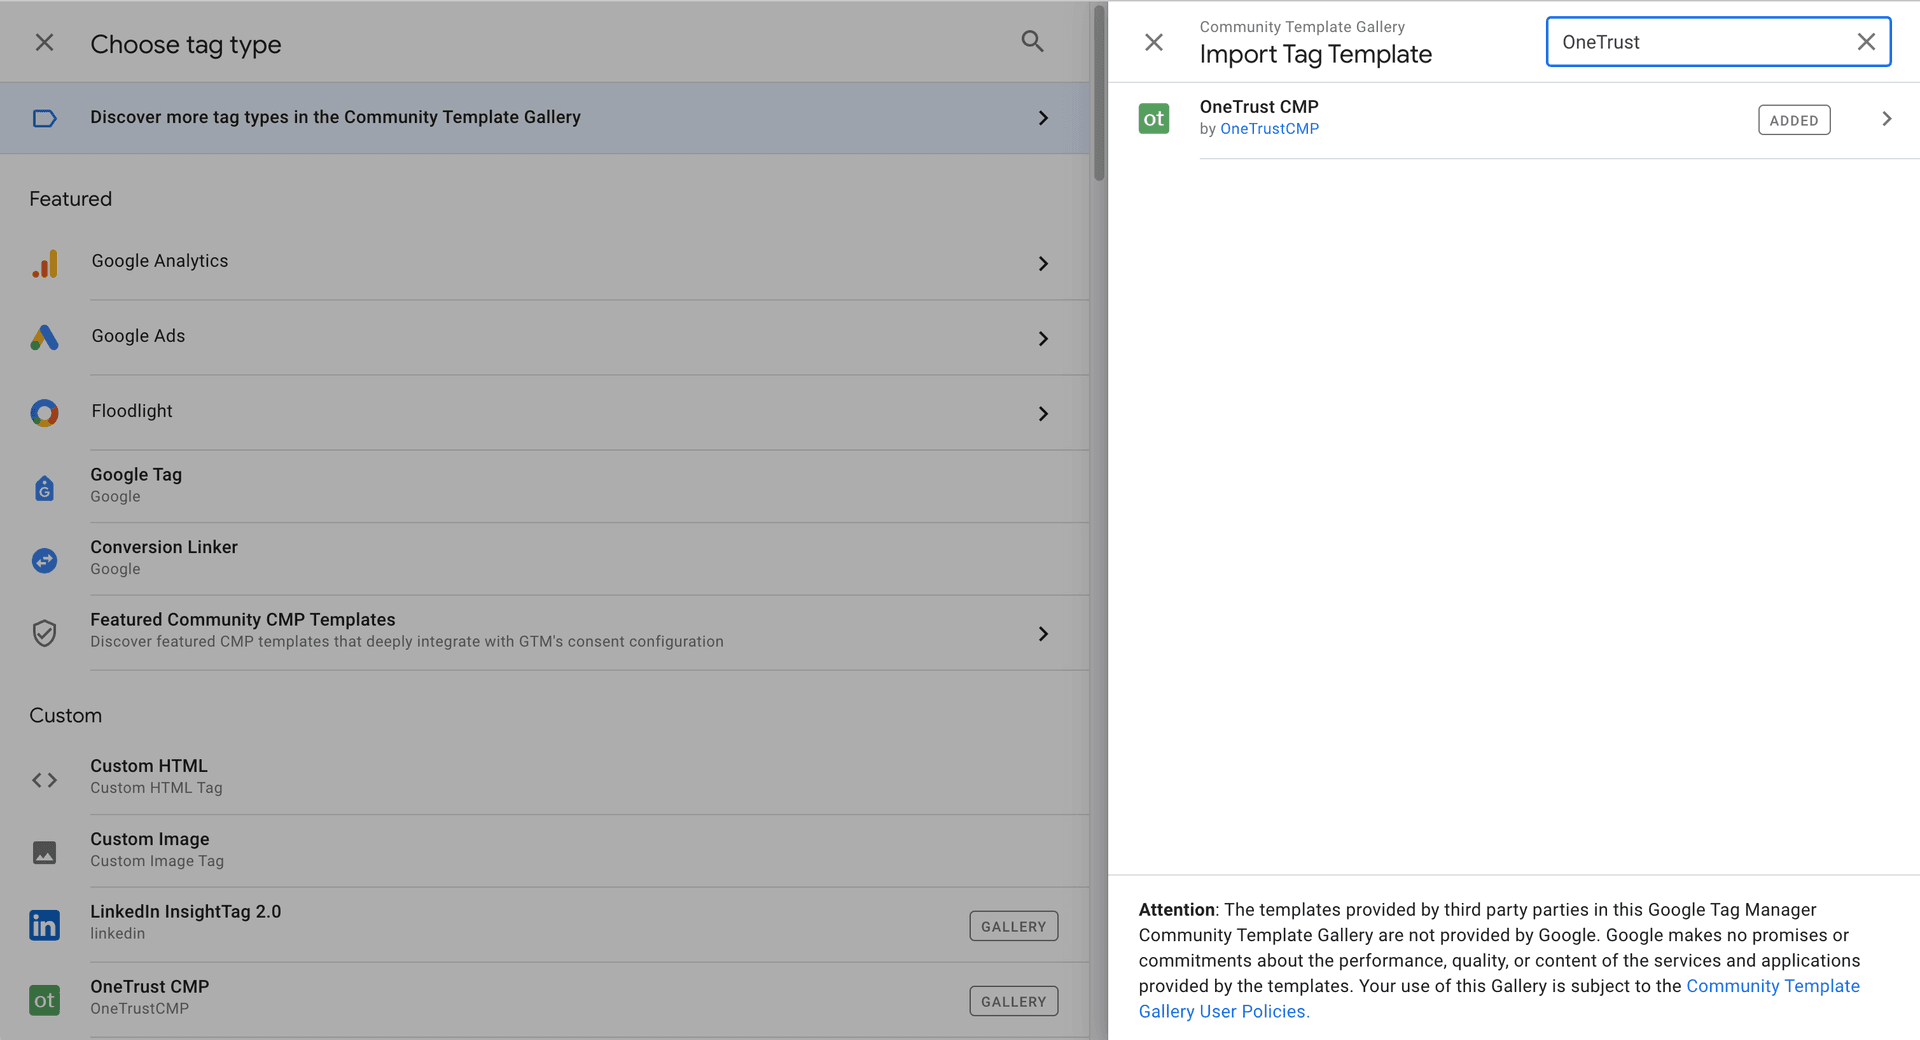
OneTrust Template
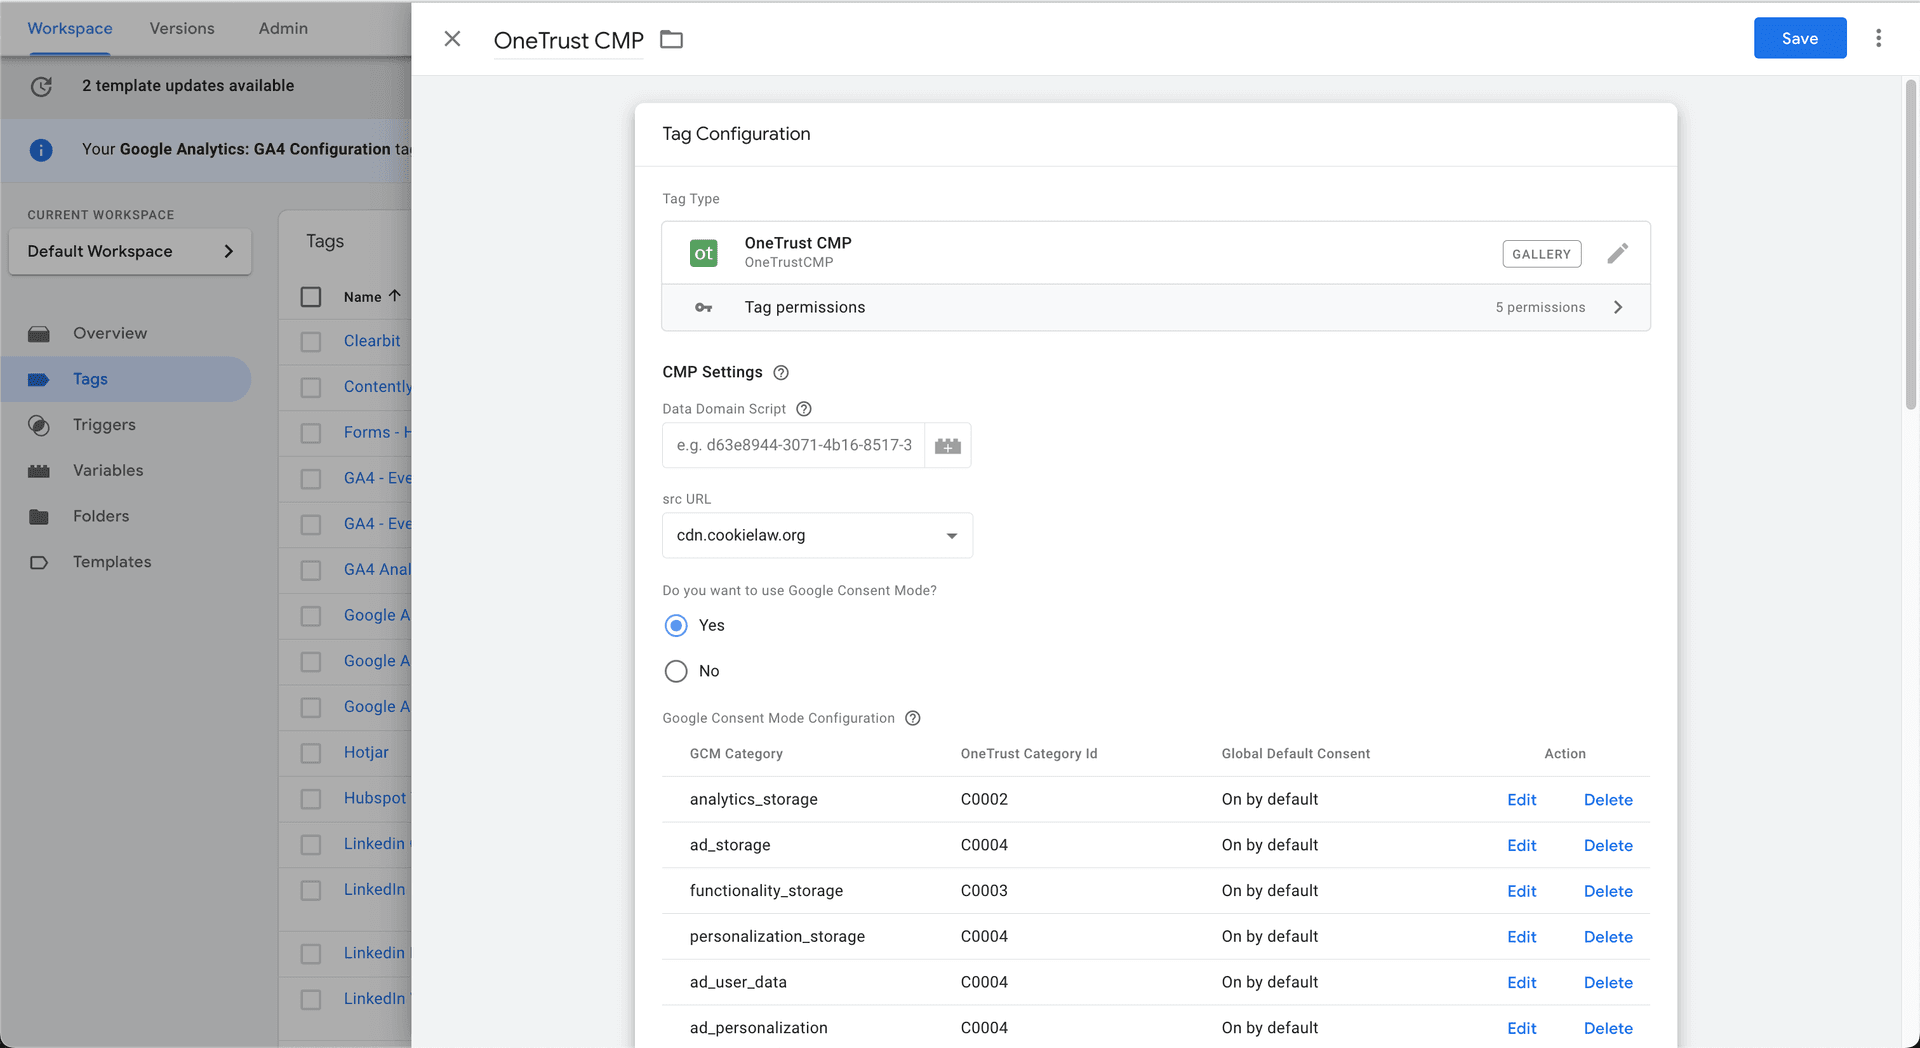
Now that you have the template imported, enter all of your OneTrust specific details in the tag:
- Data Domain Script
- Src URL
You will now map the values that you updated in OneTrust admin to the corresponding OneTrust category ID in GTM.
For example, in our GTM account, analytics_storage is mapped to “Targeting Cookies”. Targeting Cookies is a variable we have set up mapped to the C0002 value.
Template setup
If you have region specific overrides, you can enter the country / region code and set the default values on/off.
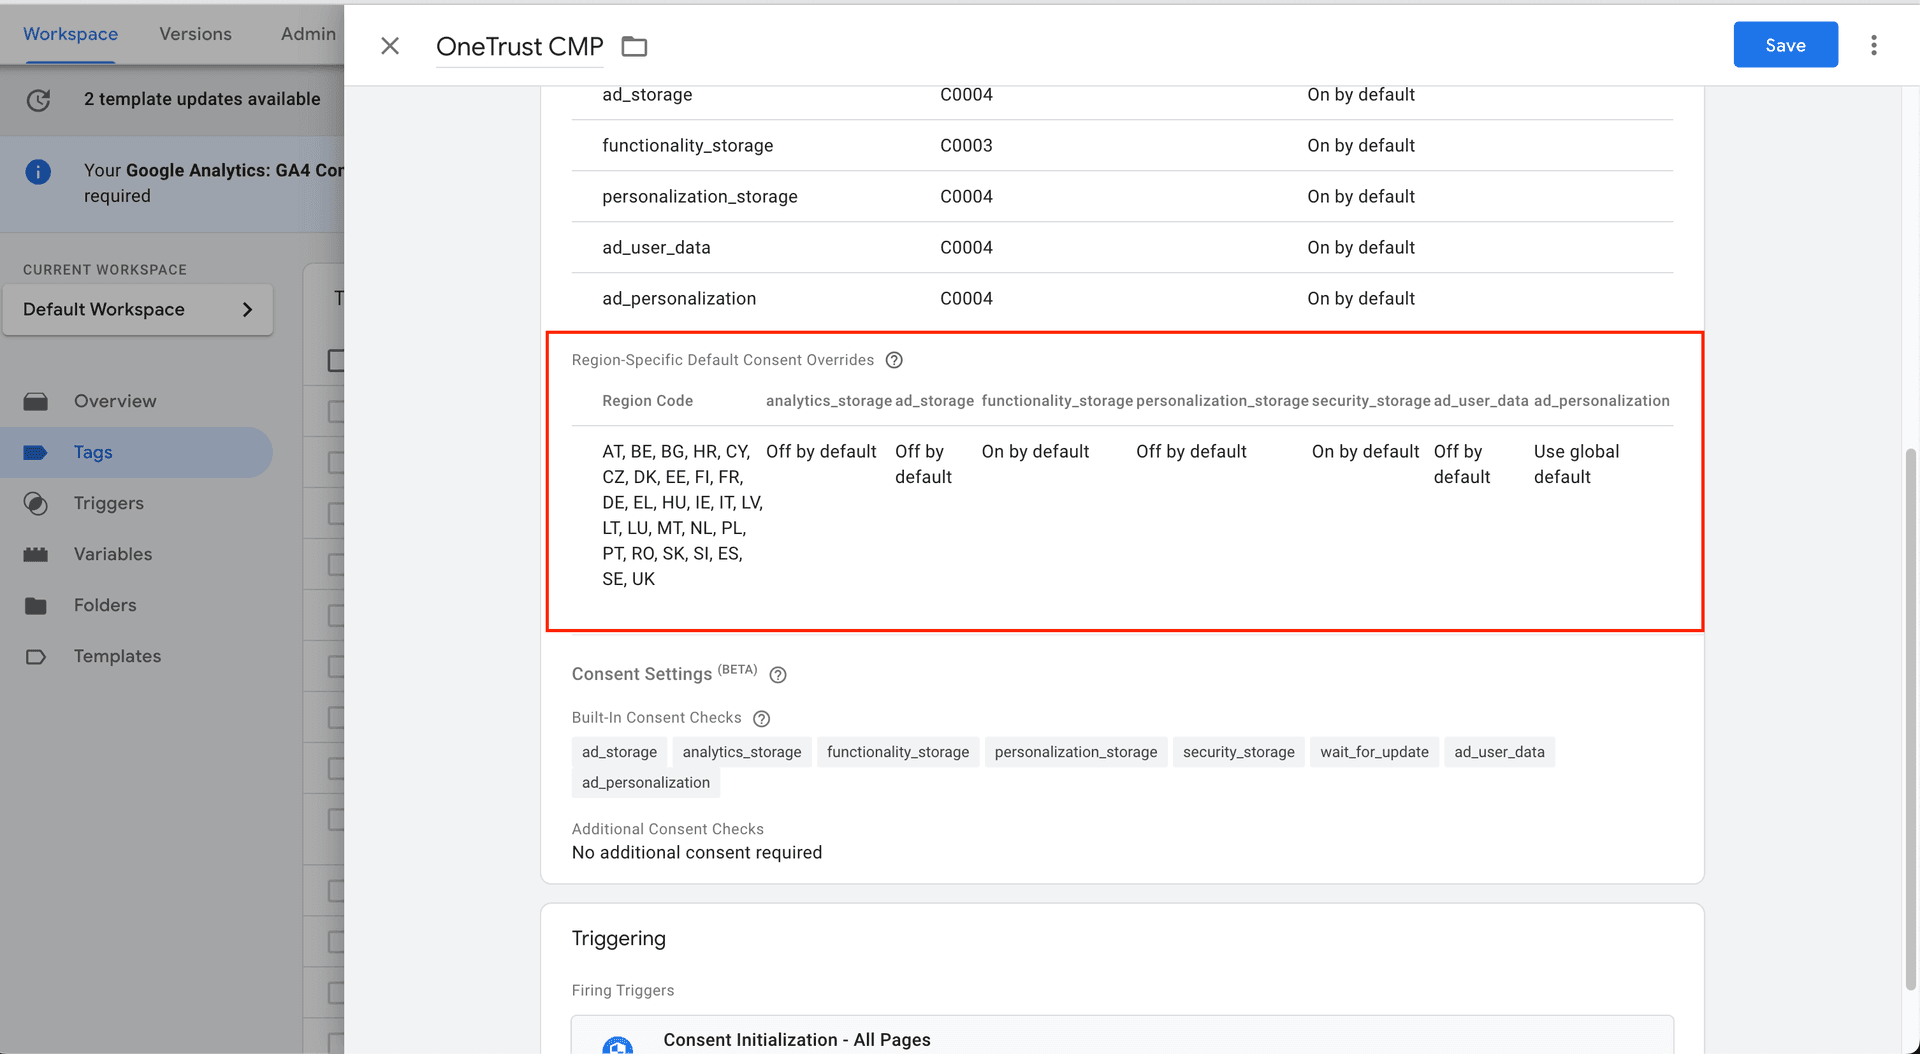
Country / region code
Finally, set the tag to trigger on “Consent Initialization – All Pages”
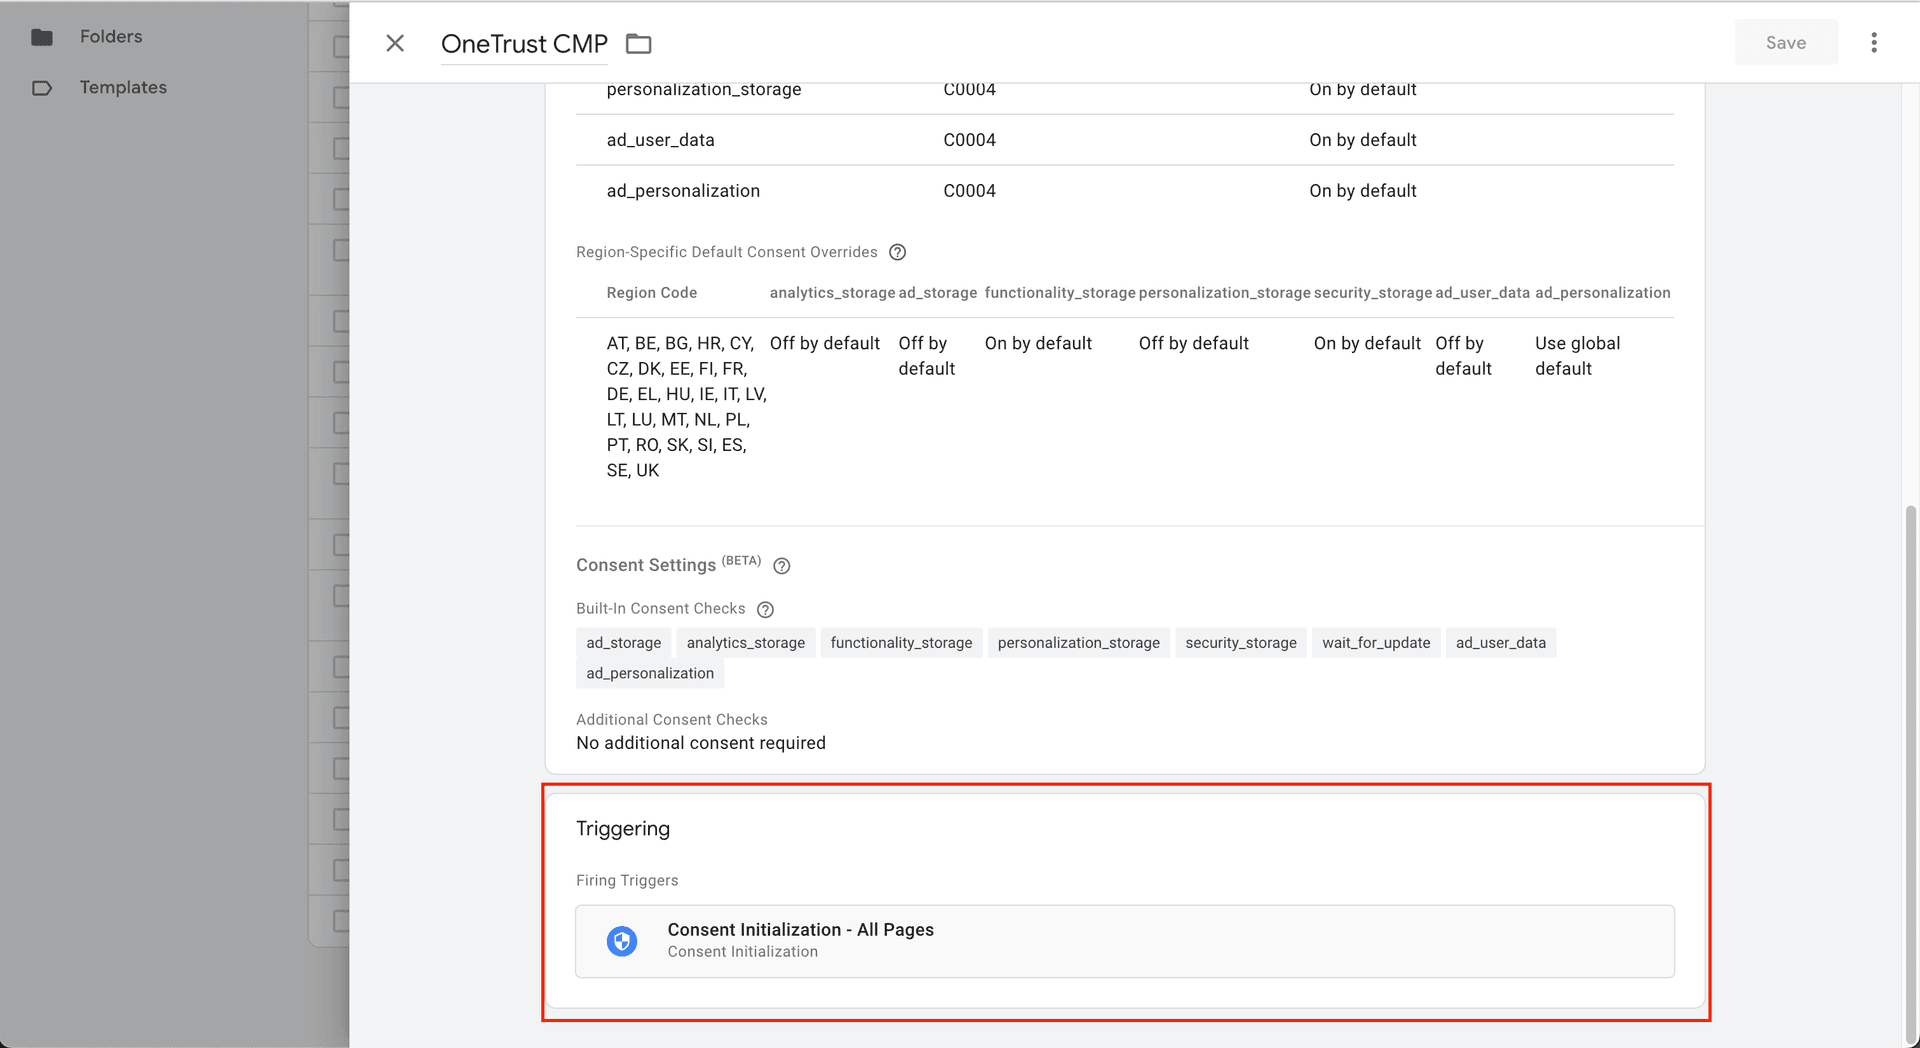
Trigger
Configure Consent Checks
Before we publish the GTM changes, you should update all other tags in the “Advanced” section of the tag setup.
If you already have the tag setup to fire only when you have consent, you can simply select “No additional consent required”.
On Google tags such as Google Analytics 4, you will notice there are built-in consent checks that Google applies automatically.
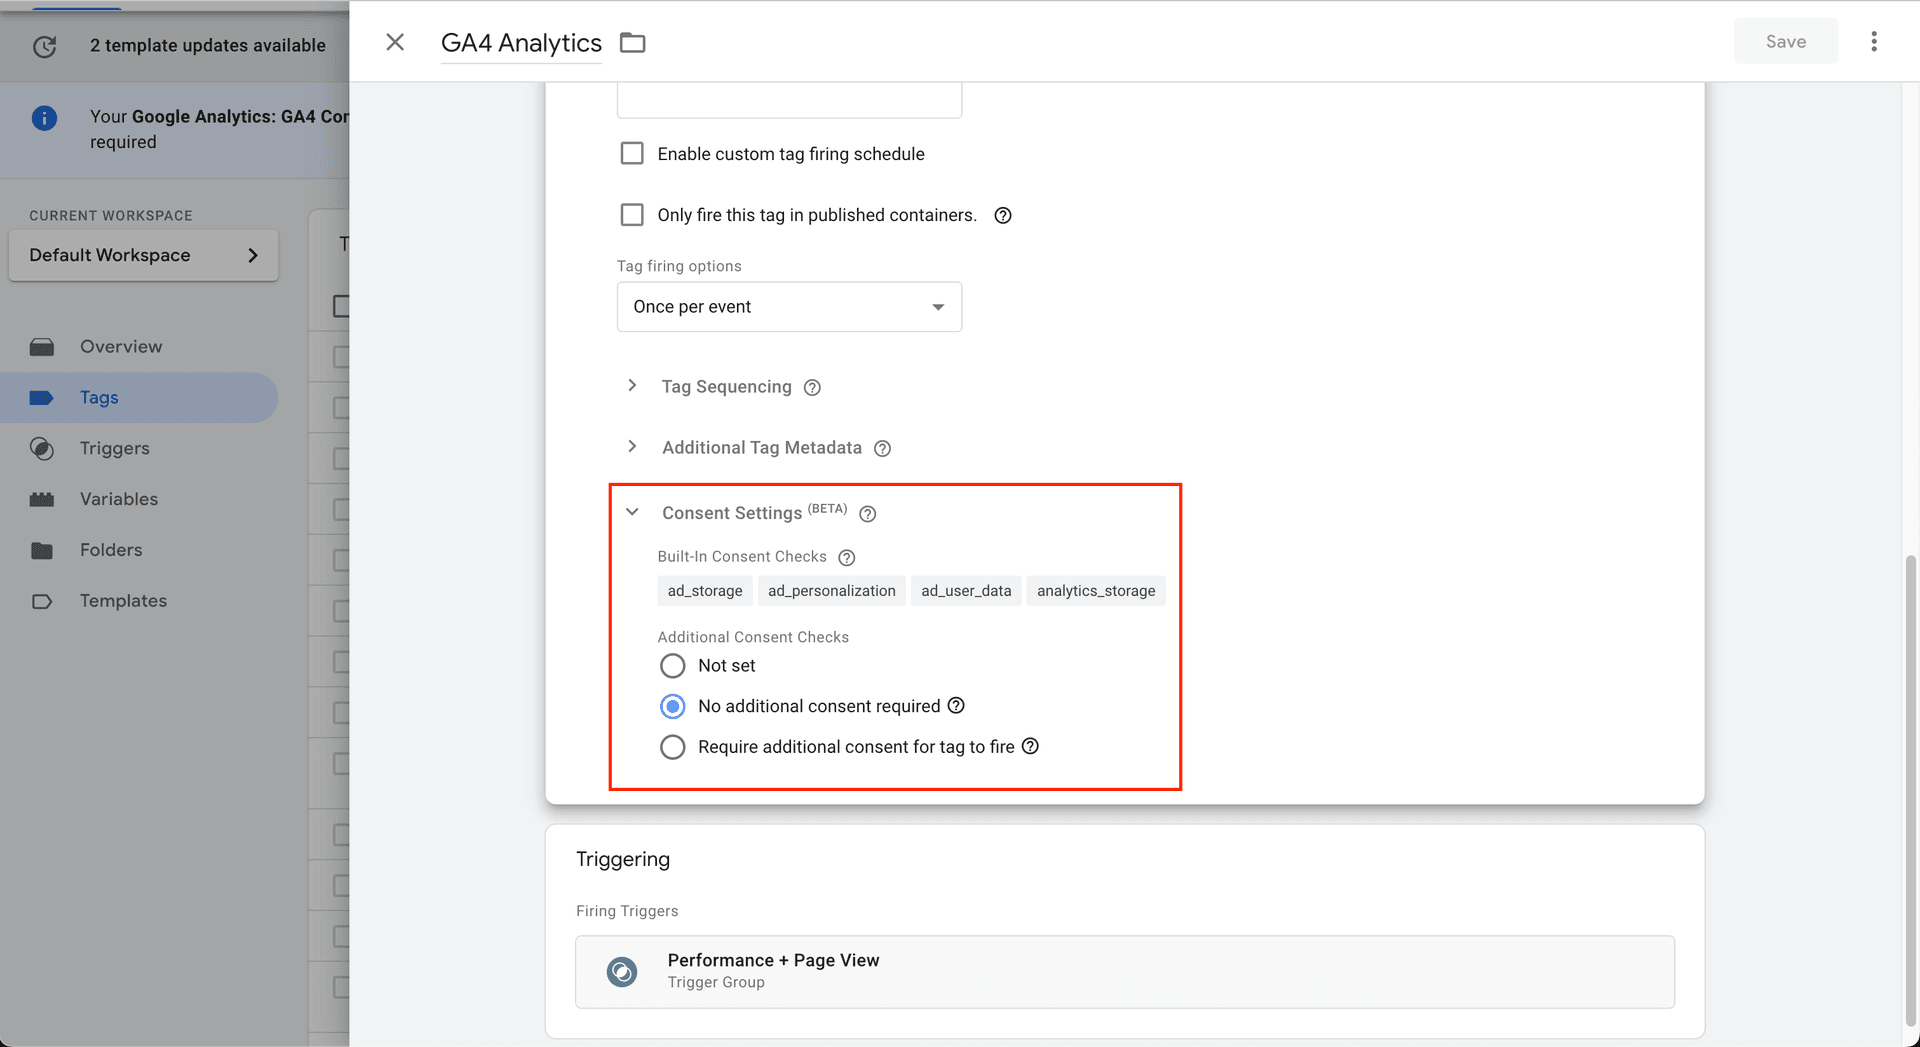
Additional consent checks
Enable Consent Overview
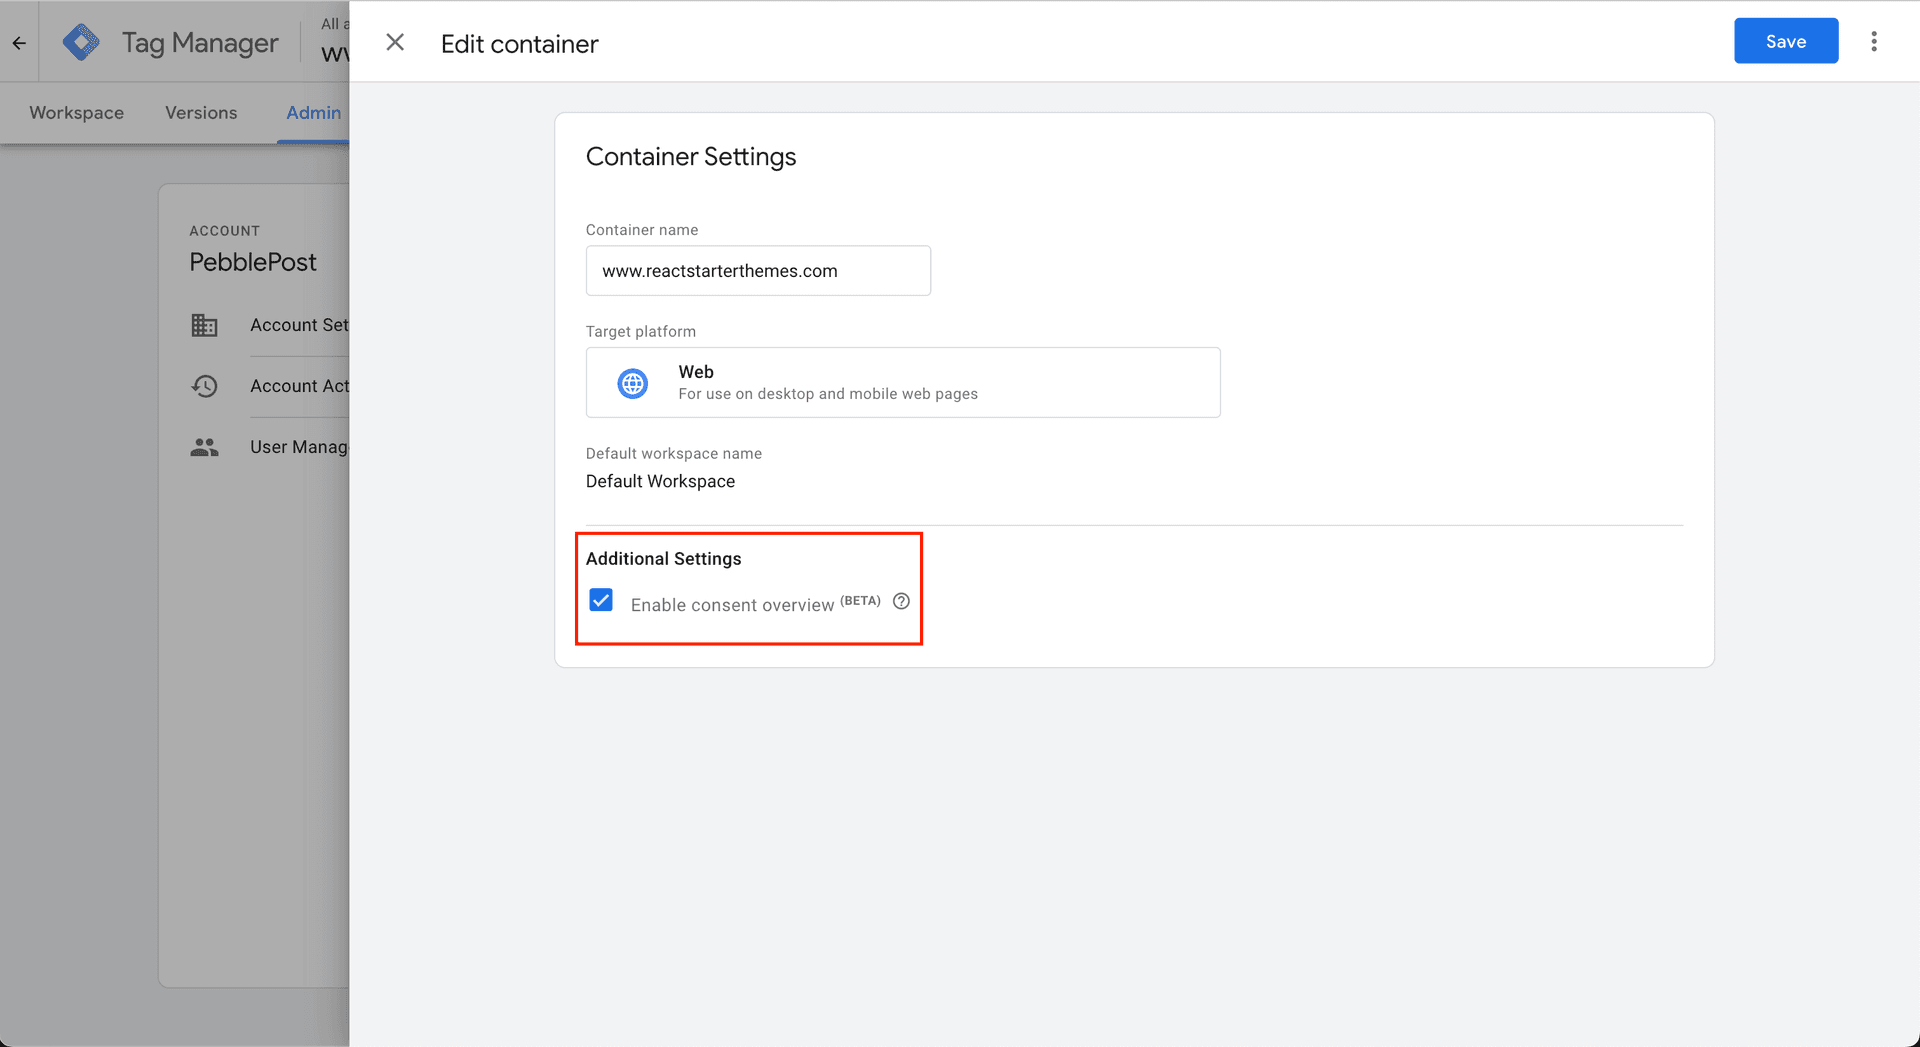
Enable consent overview
Check this box and Google Tag Manager will remind you if any tags are missing the additional consent configuration prior to publishing.
Verify Setup in Google Analytics 4
Now that we have the consent mode settings enabled in GTM and OneTrust, the last and most important step is to verify Google is receiving the proper consent signals.
Google mentions it might take up to 48 hours to see the signals, but we have seen it verify quicker in some cases.
Head over to GA4 your admin settings and click into the Data Streams section. You should see a new tab called “Consent settings”.
If you set up the integrations properly, you will see a green check mark. If not, this means there is an issue with your setup.
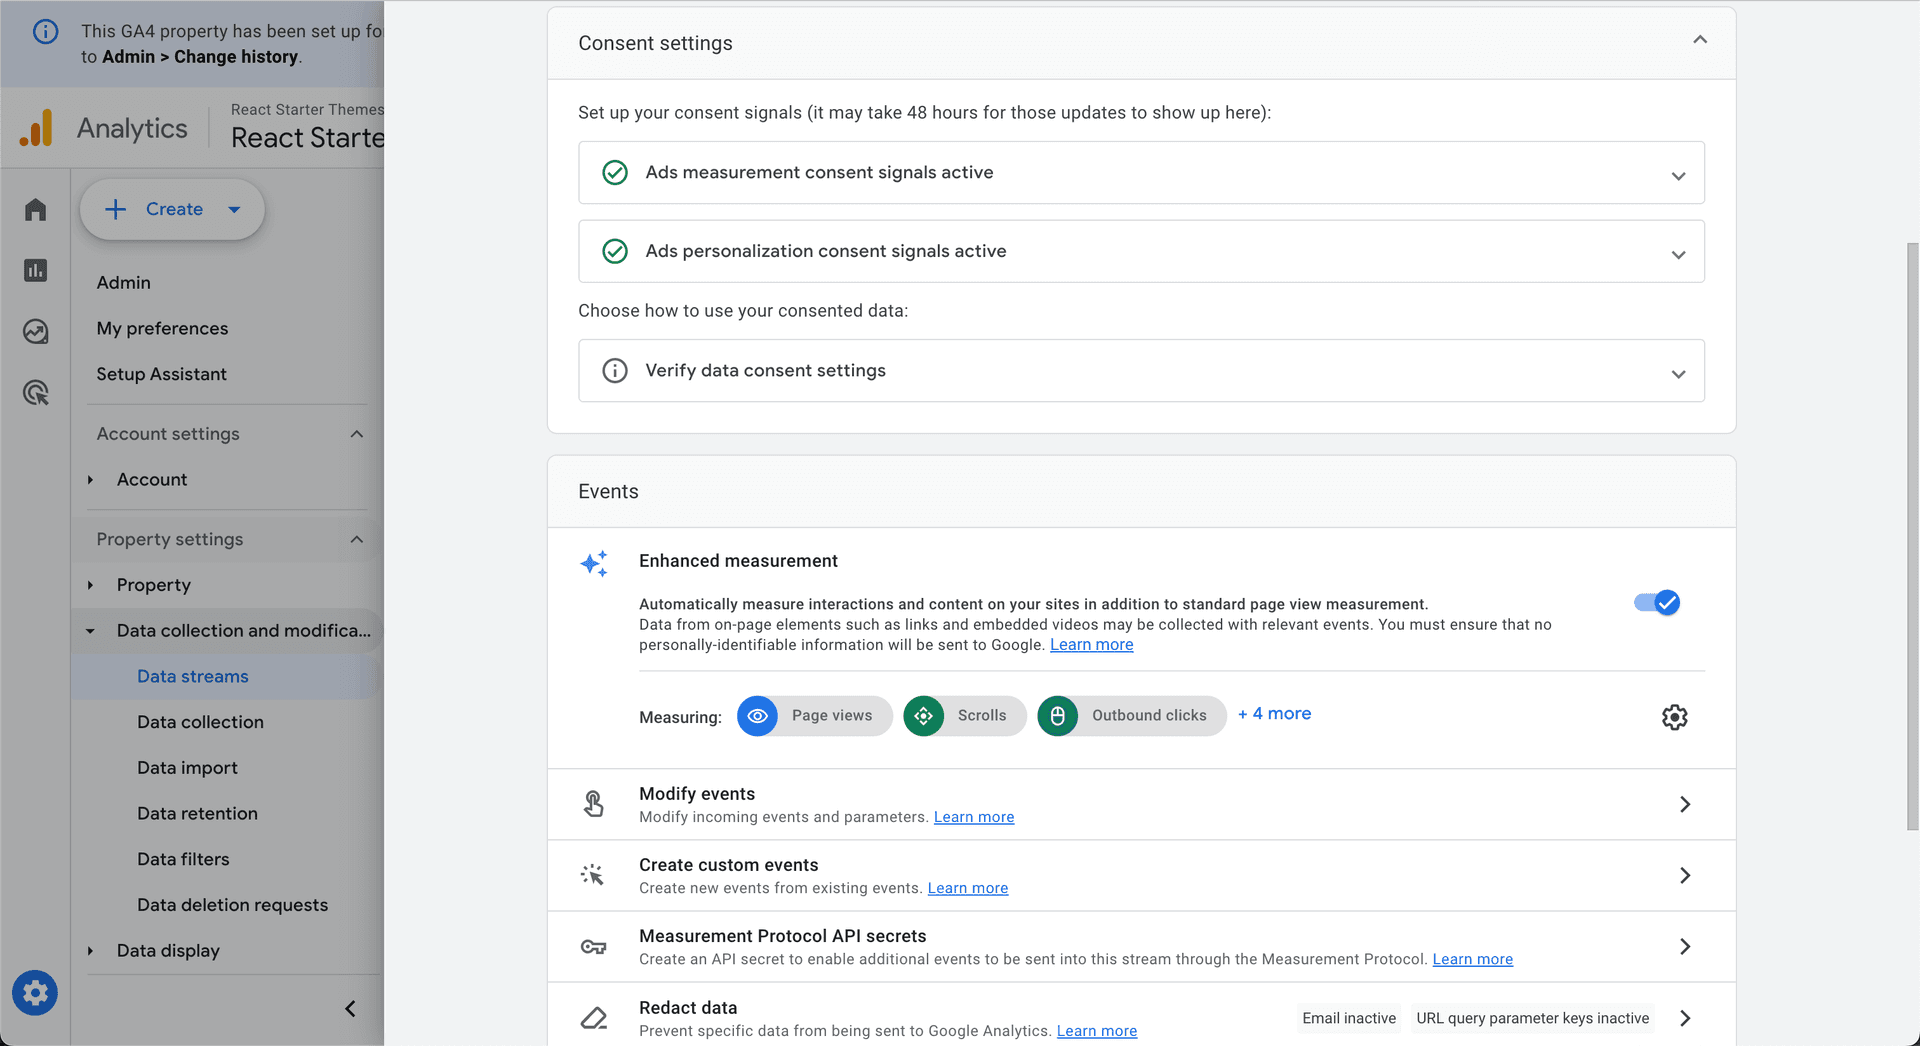
GA4 check
Need help?
This two part tutorial is brought to you Backpack Works. Backpack Works is a full-stack design and development agency that builds pixel-perfect corporate marketing sites, web apps, and mobile apps.
The Backpack team is also the brains behind the React Starter Themes templates. Are you getting errors or need us to take care of the heavy lifting? No worries – we’ve got you covered.
Simply send us a note via our contact form and we will get back to you with next steps.
Related articles

06-20-2024
How to Set Spending Limits on Vercel
In this blog post, you will learn how to set spending limits using Vercel's Spend Management feature.

06-19-2024
Setting up Netlify and Greenhouse Careers Integration
Learn how to use Netlify build hooks to integrate your Greenhouse applicant tracking system.
Subscribe to Our Newsletter
Receive the latest and video insights in your inbox.
By clicking the "Subscribe" button, you agree to receive email updates.


Professional Design and Development Services
Get in touch with us today to jumpstart your marketing machine. We are available for short and long term contracts in addition to our theme customizations.